# Users
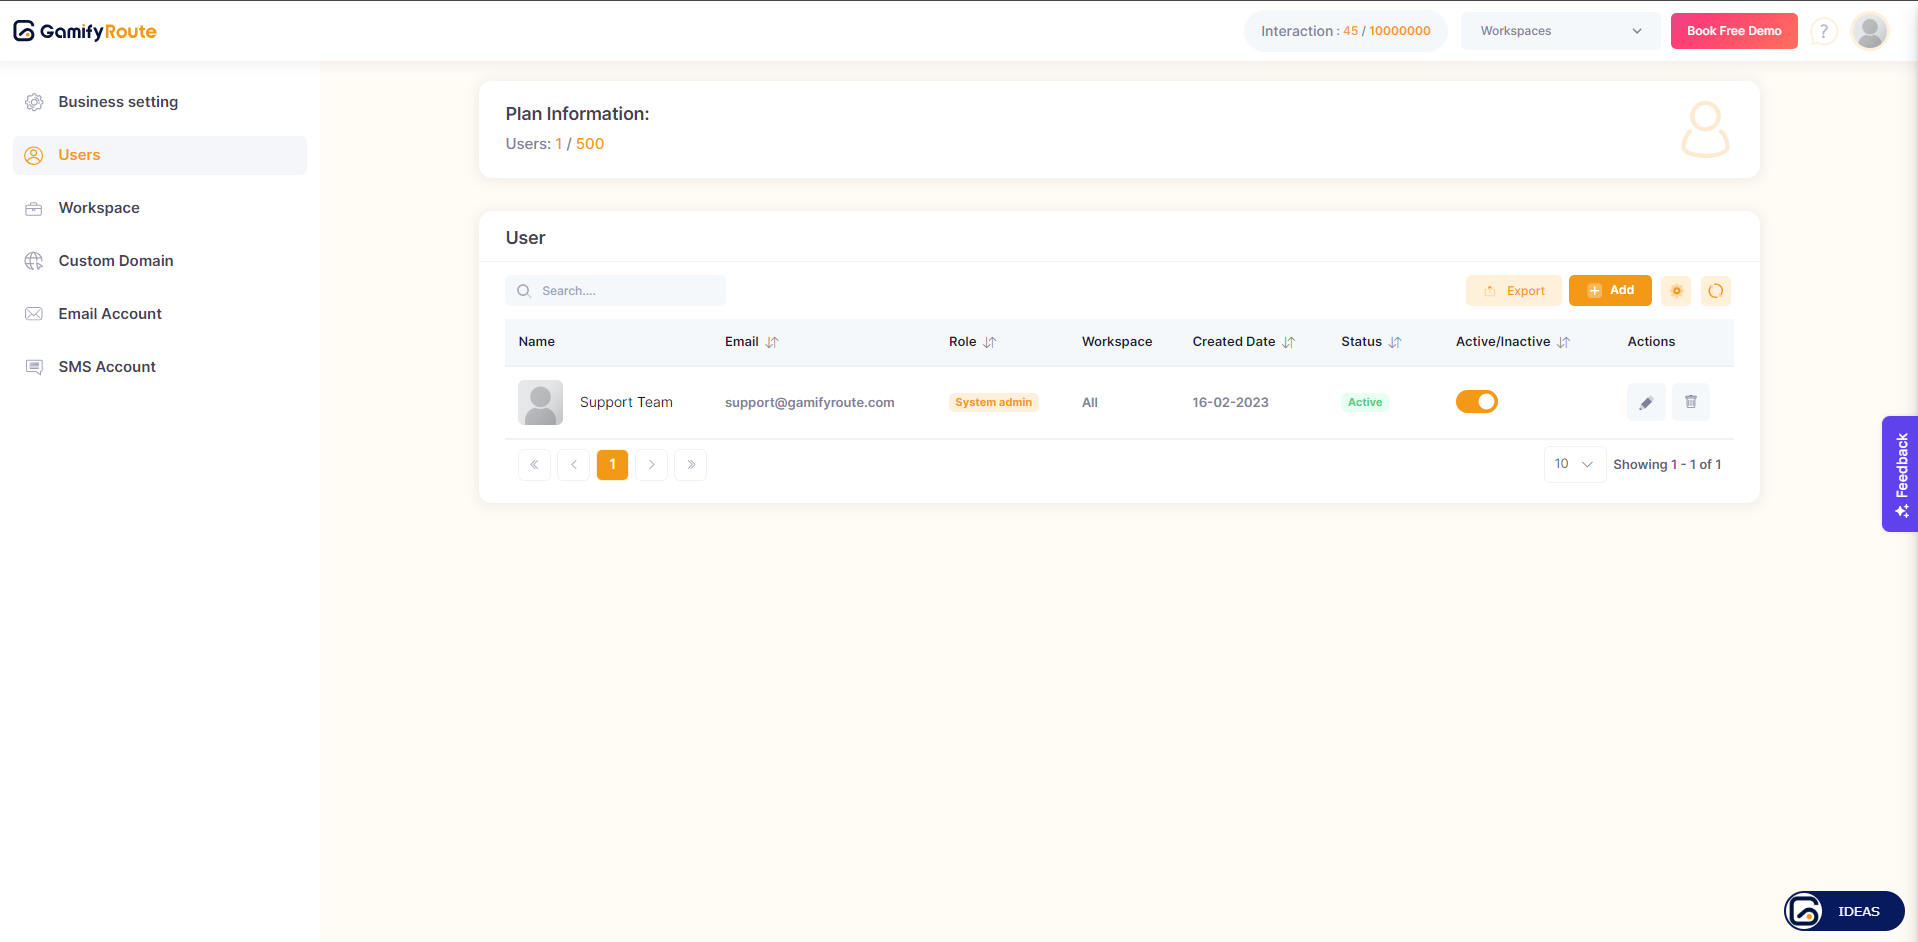
The "Users" section within the Business Settings of the Gamify Route platform is designed to manage and display the list of users who have access to a particular workspace. This section provides details about each user, including their name, email, role, workspace assignments, and status. Additionally, it allows administrators to add, edit, and manage users effectively.
User screen
## **Key Components**
### 1. **User List**
* Displays all users added to the workspace.
* Columns include:
* **Name:** User's full name.
* **Email:** User's email address.
* **Role:** User's assigned role (System Admin, Team Member, Viewer).
* **Workspace:** Workspaces the user has access to.
* **Created Date:** The date the user was added.
* **Status:** Indicates if the user is active or inactive.
* **Active/Inactive Toggle:** Quick toggle to change user status.
* **Actions:** Options to edit or delete users.
### **2. Plan Information**
* Displays the current plan's user limit.
* Shows the number of users currently added out of the total allowed (e.g., "Users: 1 / 500").
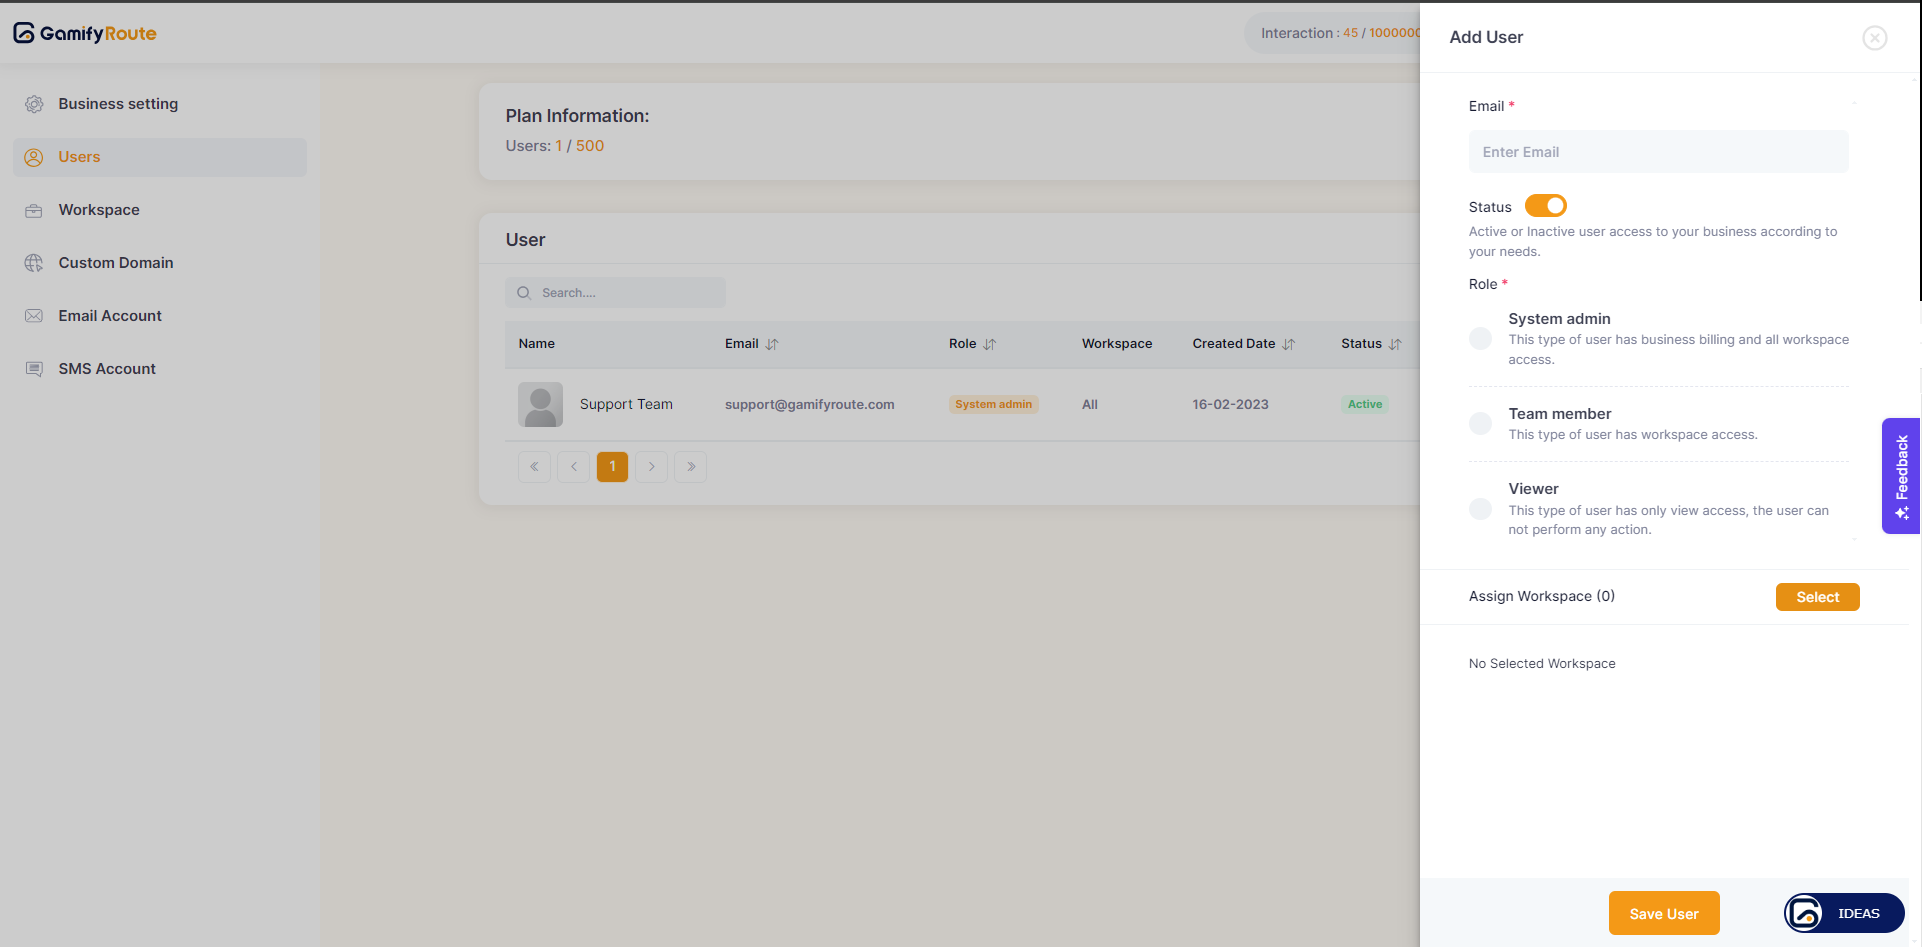
### 3. **Add User**
* A form to add new users to the workspace.
* Fields include:
* **Email:** Input field for the user's email address.
* **Status Toggle:** To set the user's initial status (active/inactive).
* **Role Selection:** Options to assign the role of System Admin, Team Member, or Viewer.
* **Assign Workspace:** Allows assigning the user to one or more workspaces.
Add User screen
### **4. Export and Import**
* **Export:** Option to export the list of users for record-keeping or offline use.
* **Import:** Option to import a list of users from an external file (not shown in the screenshots but typically a common feature).
## **Detailed Steps**
### 1. **Viewing Users**
* Navigate to the "Users" section under "Business Settings."
* View the list of users along with their details.
### 2. **Adding a New User**
* Click on the "Add" button.
* Enter the user's email address.
* Toggle the status to active or inactive.
* Select the appropriate role for the user:
* **System Admin:** Full access including business billing and all workspace access.
* **Team Member:** Access to assigned workspaces only.
* **Viewer:** View-only access without the ability to perform actions.
* Assign the user to one or more workspaces.
* Click "Save User" to add the user to the workspace.
### 3. **Editing User Details**
* Click on the edit icon in the "Actions" column next to the user.
* Modify the user's details as needed.
* Save changes to update the user's information.
### 4. **Toggling User Status**
* Use the Active/Inactive toggle in the "Active/Inactive" column to change the user's status quickly.
### 5. **Deleting a User**
* Click on the delete icon in the "Actions" column next to the user.
* Confirm the deletion to remove the user from the workspace.
***
For further assistance, please contact our support team at .
---
# Agent Instructions: Querying This Documentation
If you need additional information that is not directly available in this page, you can query the documentation dynamically by asking a question.
Perform an HTTP GET request on the current page URL with the `ask` query parameter:
```
GET https://docs.gamifyroute.com/kb/business-settings/users.md?ask=
```
The question should be specific, self-contained, and written in natural language.
The response will contain a direct answer to the question and relevant excerpts and sources from the documentation.
Use this mechanism when the answer is not explicitly present in the current page, you need clarification or additional context, or you want to retrieve related documentation sections.